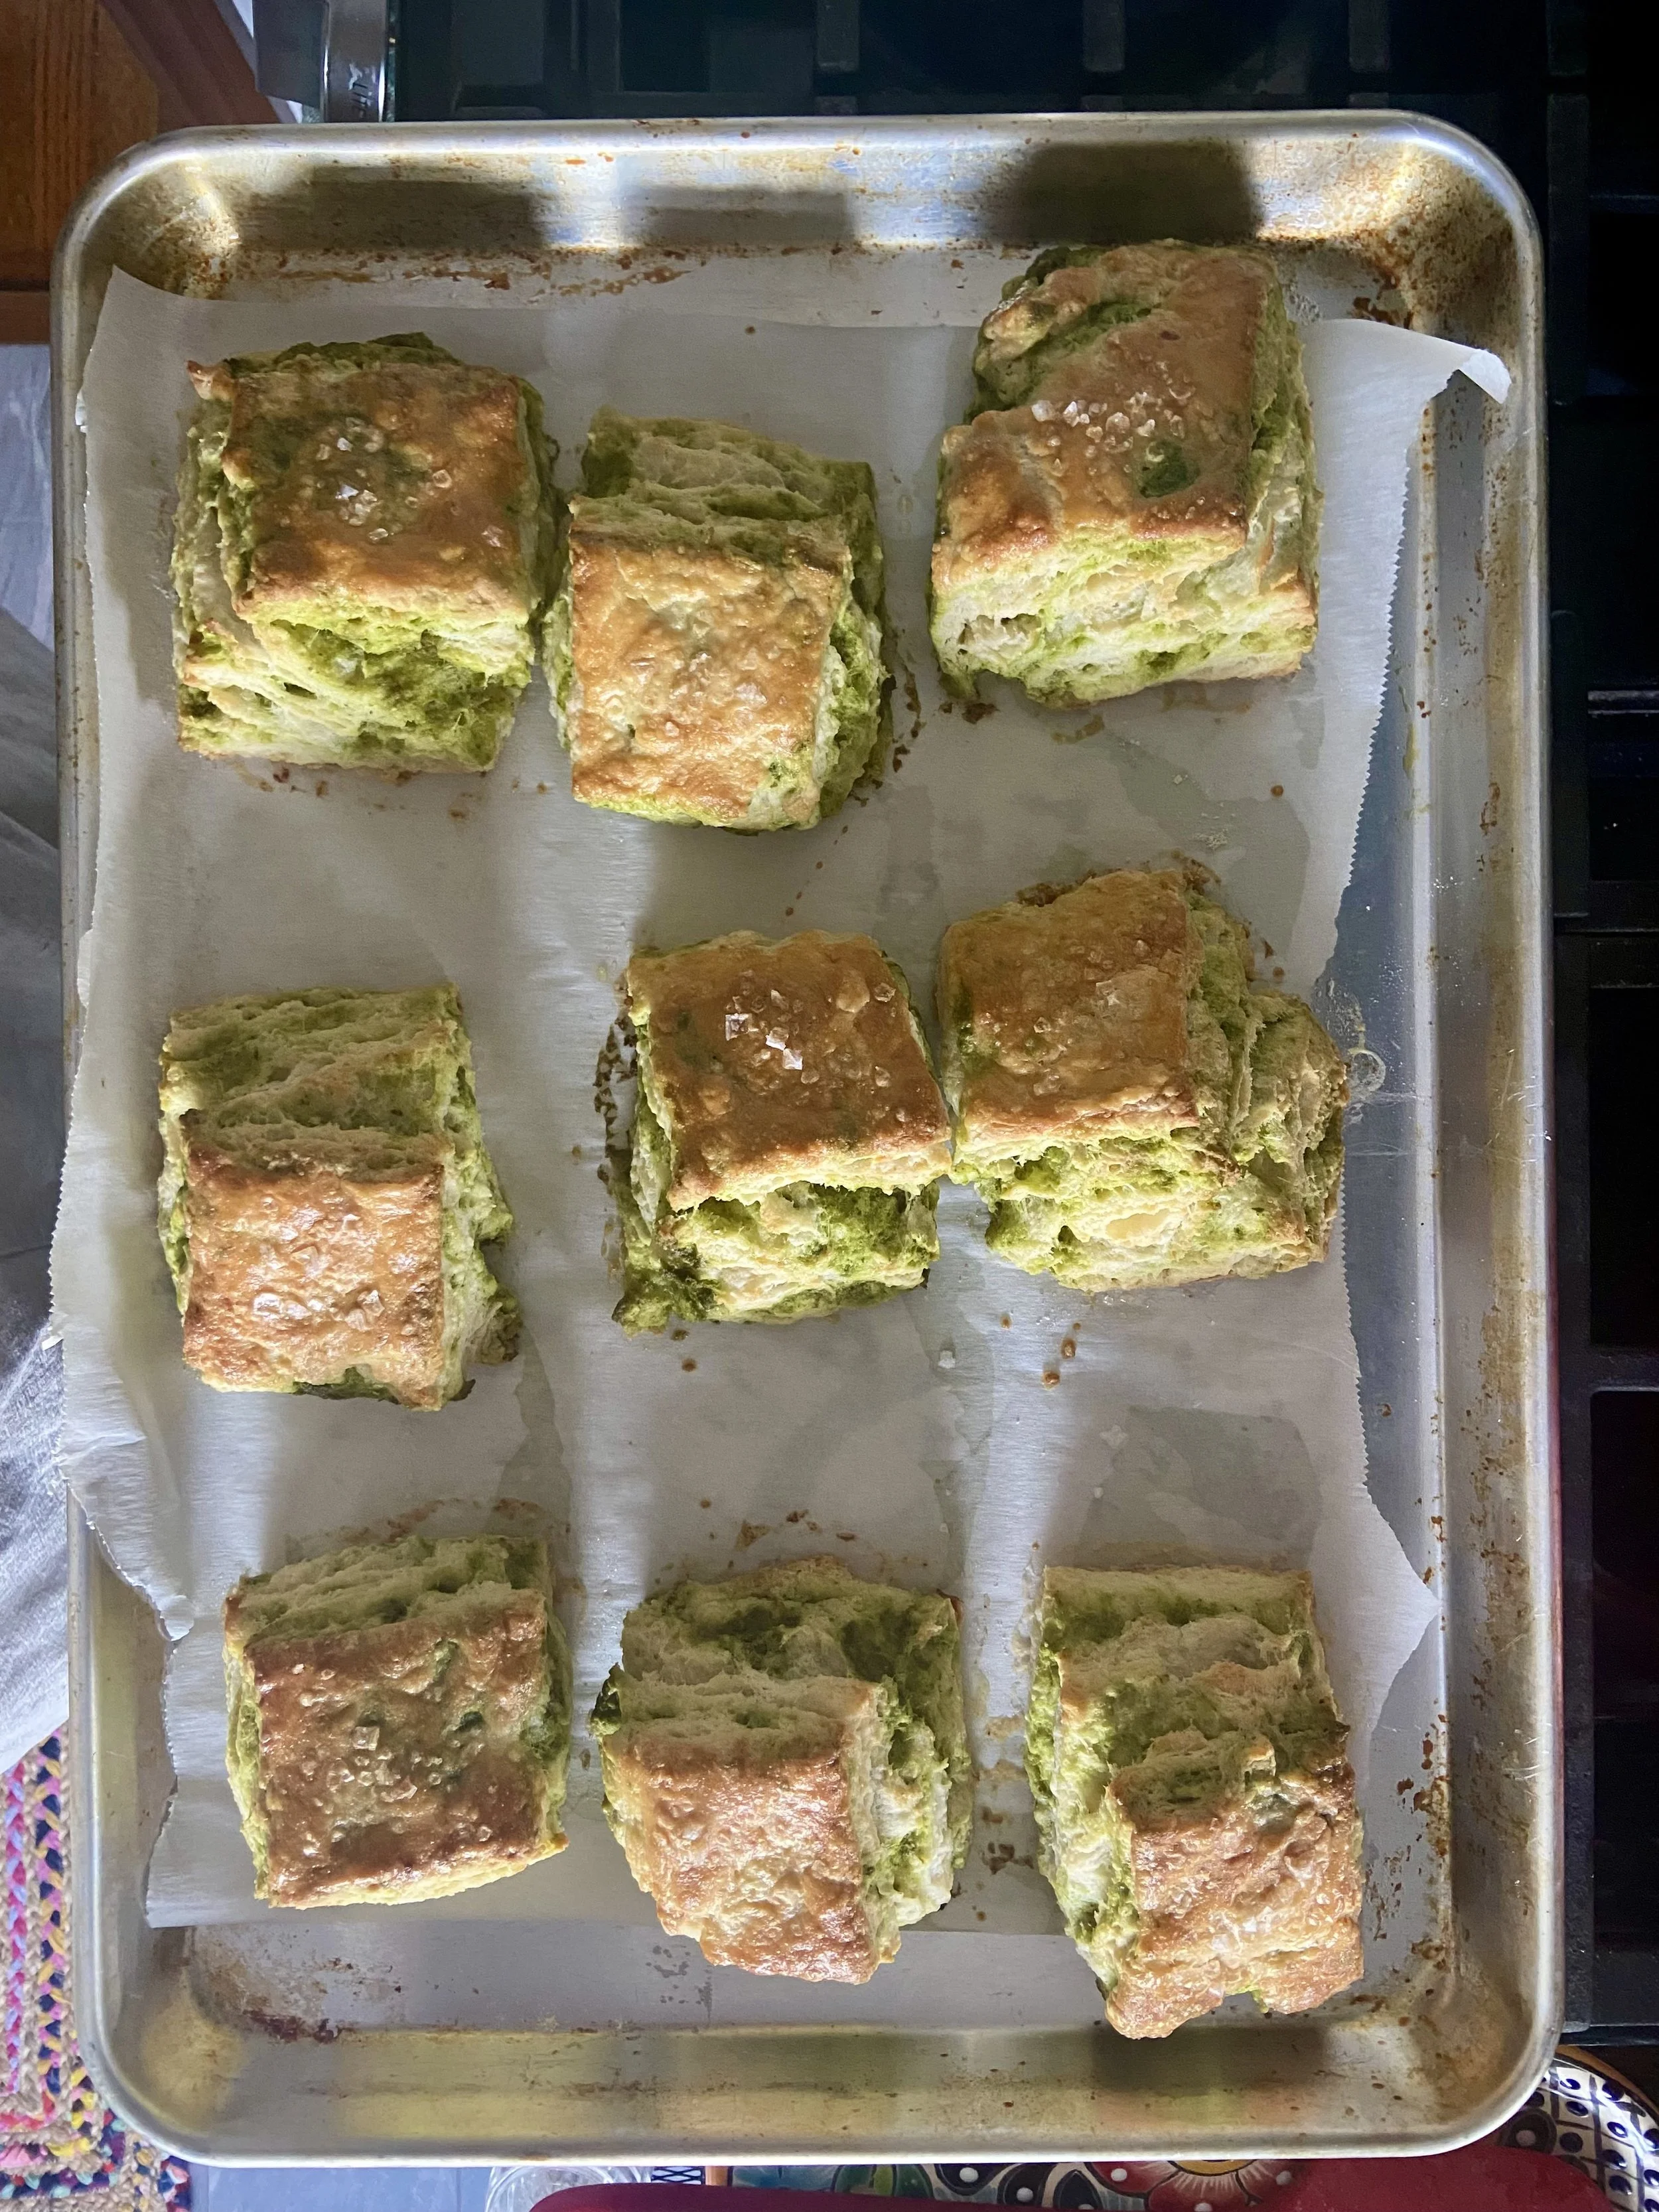
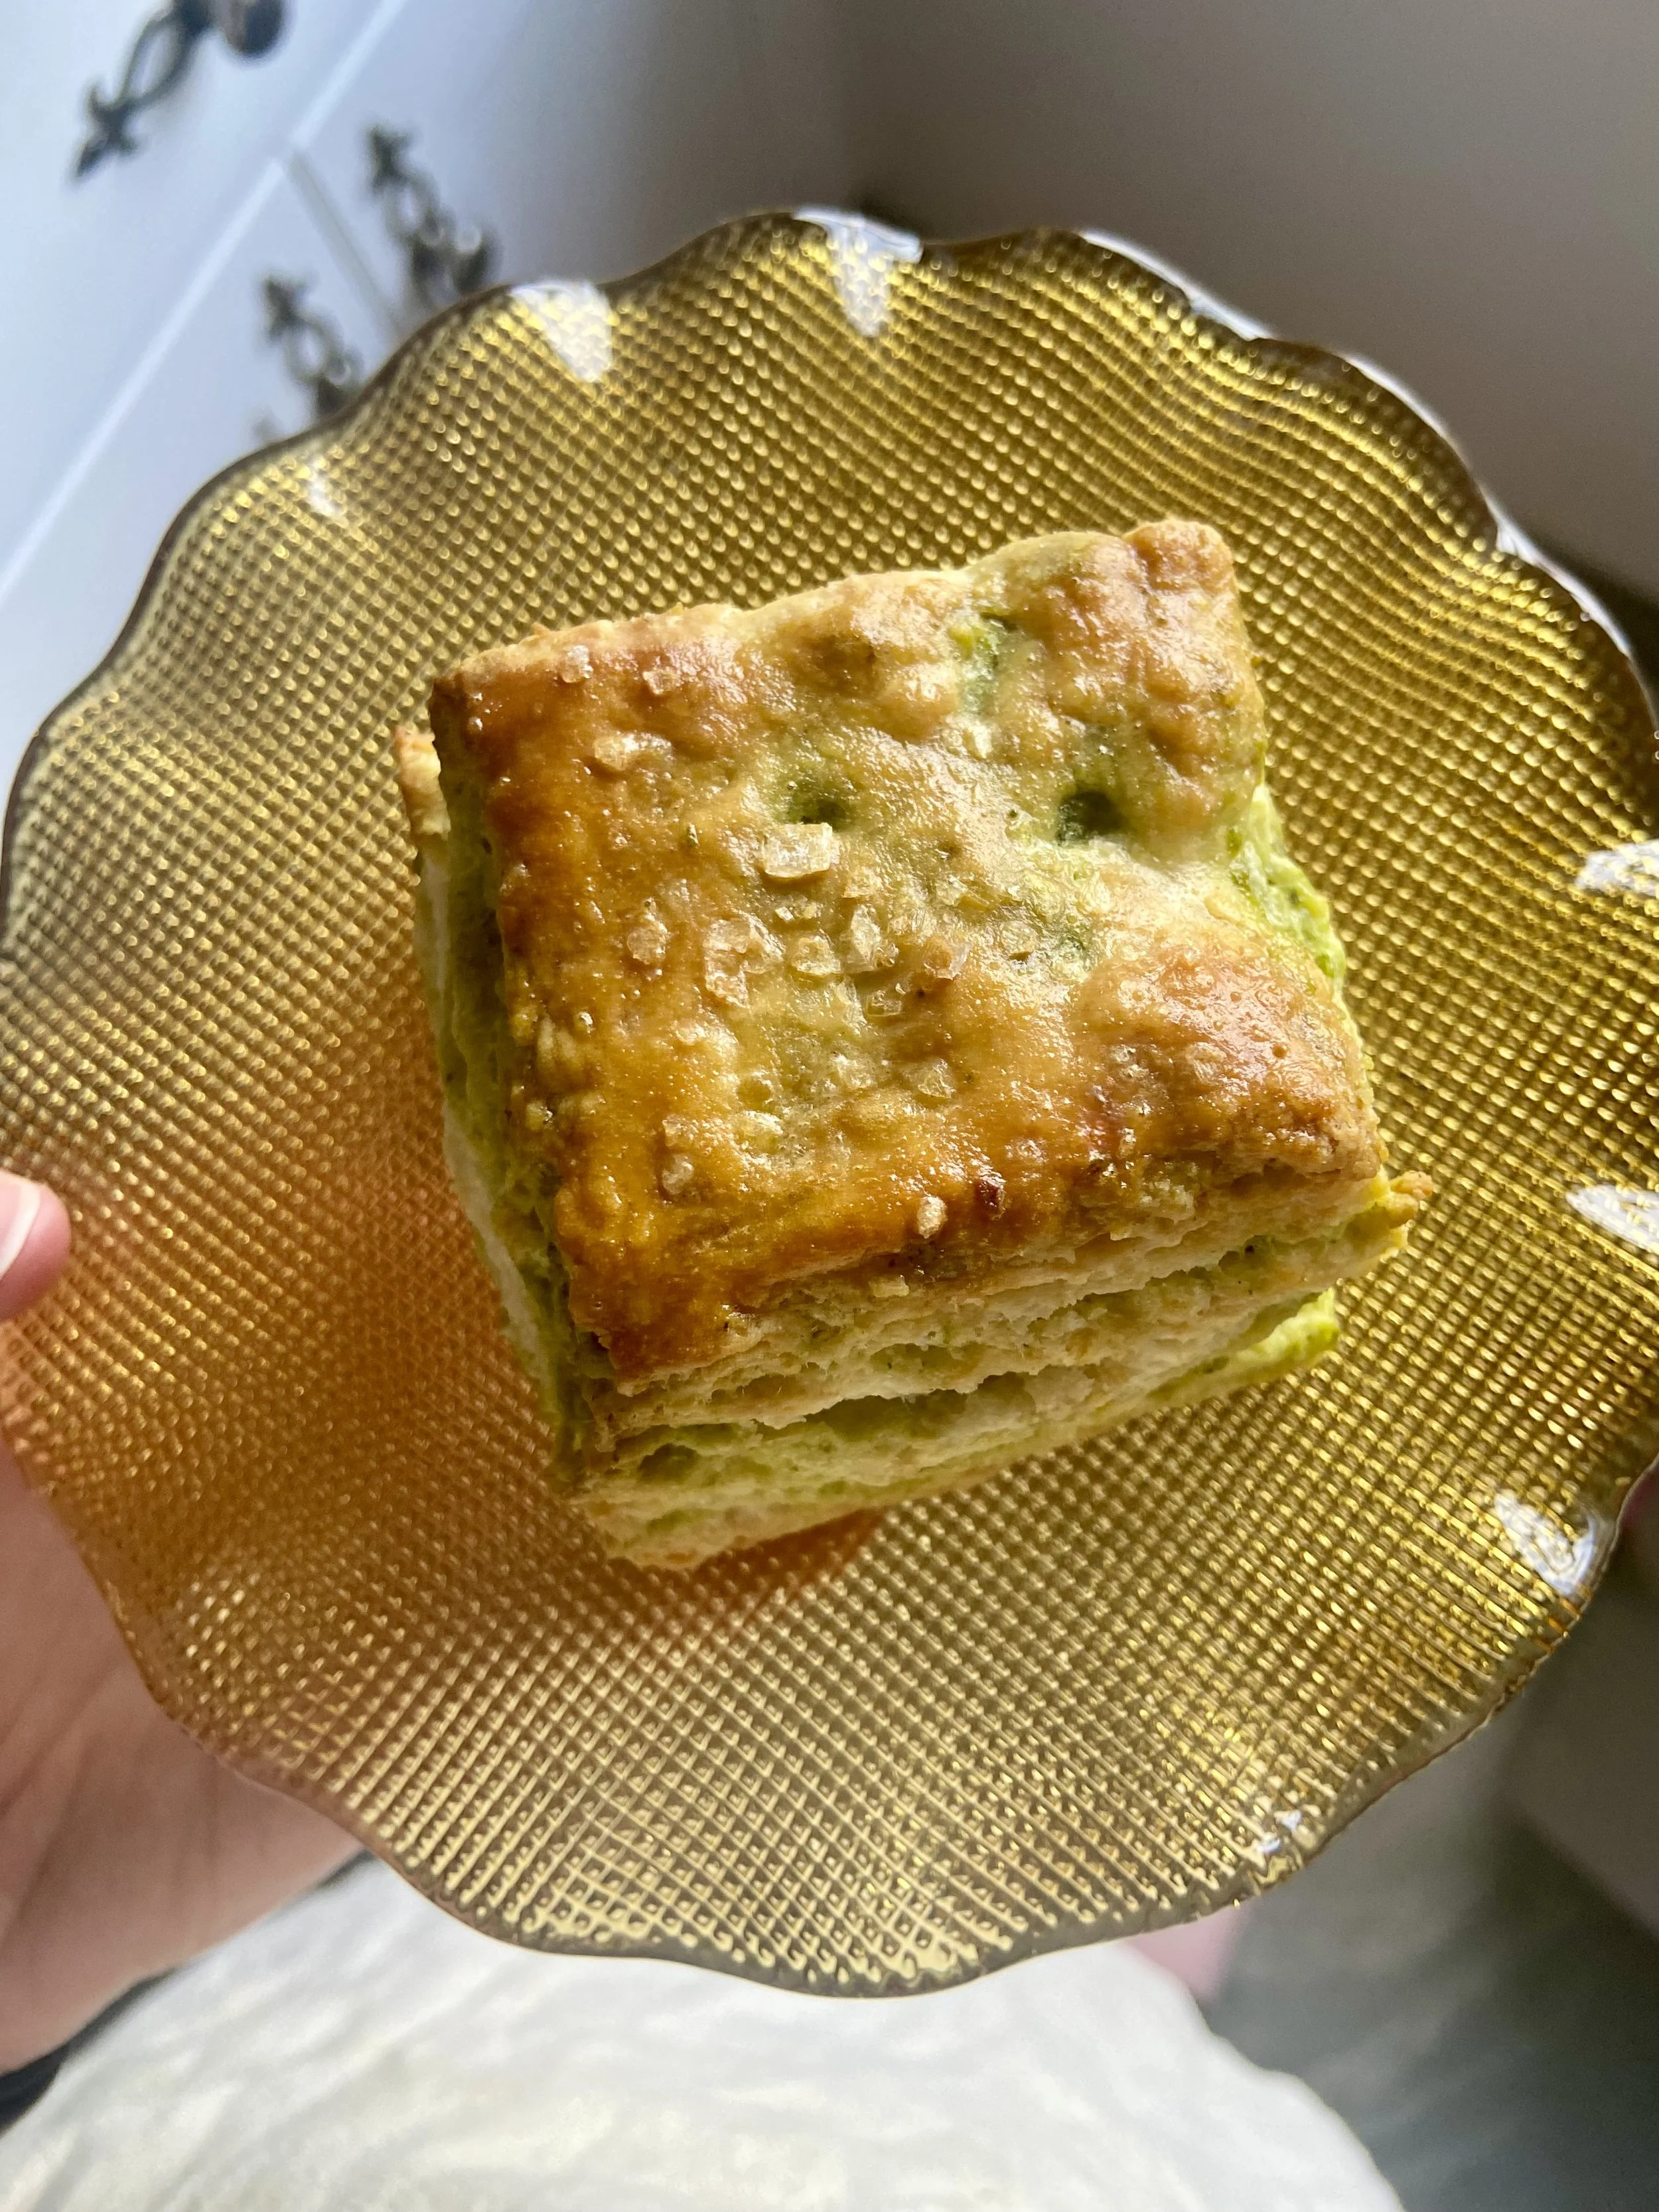
Pesto Layered Buttermilk Biscuits
This biscuit recipe might just be my pride and joy. I don’t often like to toot my own horn too much and am not usually one to say “oh if you think that’s good, just wait until you try my version of it.” But I have said that in regards to these biscuits on more than one occasion, which for me, is saying something.
I often like the idea of adding fun stuff into biscuits, but in practice I find that they can easily turn out greasy or weighed down by the additions. But here, the layers of pesto have no negative impact on texture and tons of positive impact on flavor. I tested this recipe at least two more times than I needed, just as an excuse to make them again, and I burned my fingers and mouth on every single test.
And perhaps most importantly, while I strongly encourage you to make these biscuits with the pesto, should you need a plain ole buttermilk biscuit recipe, look no further! Follow the instructions as written and simply omit the pesto. Just make sure to still do the cutting and staking when it comes time to shape the biscuits so you get all those beautiful, beautiful layers.
Makes 8 large biscuits
Total time: 1 hour 10 minutes
Active time: 25 minutes
Ingredients
4 cups (540g) all purpose flour
2 teaspoons kosher salt
1 tablespoon + 1 teaspoon baking powder
1/4 teaspoon baking soda
2 cups + 2 tablespoons (254g) unsalted butter, very cold, cut into 1/2” cubes
1 1/4 cups buttermilk, very cold
1/3 cup pesto, store bought or homemade (see “recipe” below)
Egg for egg wash
Flaky sea salt, such as Maldon
Method
Preheat oven to 425F. Line one large sheet pan with parchment.
In a large bowl, mix 4 cups (540g) flour, 1 tablespoon + 1 teaspoon baking powder, 1/4 teaspoon baking soda, and 2 teaspoons salt. Whisk until combined.
Add in 1 cup + 2 tablespoons (254g) cubed, cold butter. Give everything a good toss to make sure no butter is stuck and all cubes are coated in flour. Moving somewhat quickly, smoosh and flatten the cubes of butter between your thumb and your fingers. The goal here is the break down the butter into the desired size without letting the air temperature or our body temperature melt the butter. Try to only use the tips of your fingers, rather than your whole palm, to break down the butter. Once each cube has been flattened and broken up, go back through and break apart the bigger pieces of butter until most are about the size of a cranberry. You’ll have some pieces a bit smaller and some a bit bigger, but that’s okay. If the butter is starting to feel a bit warm or too soft, place the bowl in the fridge or freezer for about 10 minutes before moving on to the next step.
Add 1 cup buttermilk, reserving the remaining ¼ cup. Mix with your hands (or a spatula if you prefer) until a shaggy dough forms (see note). If there are still dry patches, add a some of the reserved buttermilk 1 tablespoon at a time until it just comes together.
Remove the dough from the bowl and place on an unfloured surface. Give it a few kneads just to make sure all flour and buttermilk are combined. Flatten the dough into a 1” thick rectangle and cut it into thirds. Spread about 1/3 of the pesto each onto two of the thirds (there should be about 1/3 of the pesto remaining). Using one of pesto topped thirds as your bottom layer, stack the second pesto topped third directly on top, followed by the non-pesto third as your top layer. At this point, feel free to lightly flour your surface if the dough is sticking.
Lightly sprinkle the top of your dough stack with flour and gently press and roll the stack into a 1.5” tall rectangle. This may get a little messy, as some pesto may be pushed out during this process. This is totally fine, just keep a towel nearby to clean up your work surface or hands as needed and re-flour to help with sticking.
Once you have a 1.5” rectangle, cut it in two and spread the remaining pesto over one of the halves. Place the non-pesto half on top of the pesto topped half and once again, press and roll into a 1.5” rectangle. Cut into 8 equal rectangles, space out evenly on the prepared sheet pan, and place in the freezer for 10-15 minutes.
While the biscuits are chilling and oven is heating up, prepare your egg wash by thoroughly whisking one egg in a small bowl. When the biscuits are ready, brush the tops with the egg wash and sprinkle with flaky salt (see notes).
Bake for 20-25 minutes until the tops are a nice golden brown. Allow to cool for a few minutes simply so you don’t burn yourself then eat immediately. If not eating immediately (how? why?) they will keep in an airtight container at room temperature up to 3 days (see note). To reheat, place on a sheet tray in a 350F oven for about 10 minutes.
Pesto
This is by no means a traditional recipe and quite honestly, I only use that name as it is the closest well-known descriptor for this “recipe.” This is very much a *go with the flow* sort of concoction, as it is one I make often, with no measurements and strictly based on what I have on hand.
In a food processor add about 2 cups of basil (from about 1-2 bunches or containers, does not need to be exact), zest and juice of half a lemon, 1 grated clove of garlic, ¼ cup grated parmesan, 1 tablespoon pine nuts or a few walnuts, salt to taste, and ¼ olive oil. Don’t have parm? Bummer, but that’s okay! No pine nuts or walnuts? No big deal! Have a bunch of parsley and cilantro on hand rather than basil? Sounds great! Feeling a wild and want to add a little jarred Calabrian chile? Go for it!
Blend until the herbs and nuts are finely ground and the oil is emulsified. Taste and adjust for salt, lemon, olive oil as needed!
Notes
Keep your measured buttermilk and cubed butter in the refrigerator until the moment you need them. We want those ingredients to stay as cold as possible. When you’re making any sort of pastry dough (like biscuits or pie crust) that has you start with cold butter, the goal is to keep the butter cold throughout the entire process, so it is unable to full incorporate into the dough (which is what happens when you used softened butter to make cookie dough). With biscuit dough, we want a product that is tender and flaky. The larger, unincorporated chunks of butter are what create that tenderness and flakiness. There are two reasons for this. First, the butter gets in the way of long “gluten strands” forming in the dough once the liquid is added. When flour and a liquid are mixed, the proteins in the flour bond together into long strands. The structure this creates is the main building block in the making of bread. By inhibiting those strands from forming, we get much shorter strands and more tender dough. Second, the chunks of butter throughout the dough will melt and create steam in the oven, leaving behind nice little air pockets. This creates flakiness.
If you don’t want to use egg wash, you can use a bit of heavy cream or melted butter to top the biscuits before baking. I really like the color and sheen you get from using egg, and while cream or butter won’t give you the same sheen, they will still provide nice color.
Why does everyone always say “shaggy dough”? Biscuits truly are at their pinnacle when they come from a dough that has had *just* enough liquid added. Add too little and you end up with a dry biscuit. Not ideal. Add too much and you’ll end up with a denser, less tender, possibly even somewhat chewy biscuit. Also, not ideal. But when the right amount of liquid is added, the dough kinda looks shaggy. There are no hidden pockets of flour, but the whole thing isn’t sticky and homogenous. When you apply pressure, it will come together, but the dough will feel a bit dry to the touch. As you roll out, cut, stack, and roll out again, the buttermilk will more thoroughly hydrate the dough. This is why I like to reserve just a bit of the buttermilk. Your flour, the temperature, and humidity of your environment can all play a roll in how much liquid you need to use. Also give your dough a few good kneads and a bit of time to fully absorb the liquid. When I first learned how to make biscuit dough (and pie dough), I would be so concerned with not overmixing the dough that I would try to mix it too quickly and end up adding too much liquid. I would then over-correct the next time and be so worried about repeating my previous mistakes that I would add too little liquid. I then learned to be a bit more patient. Mix the dough enough and give it a little time before deciding to add more liquid.
Unbaked biscuits can be frozen on a sheet tray, transferred to a resealable bag, and kept frozen for up to 3 months. Bake them from frozen whenever you please! But add about 5 minutes to the baking time.

